Have you ever wondered how you make a backpack from scratch? Imagine creating a bag that fits your style perfectly and holds everything you need.
It’s easier than you think, and you don’t need to be an expert. In this guide, you’ll discover simple steps to craft your own backpack. By the end, you’ll have the skills to build a sturdy, functional pack tailored just for you.
Ready to start? Let’s dive in!
Materials Needed
Making a backpack starts with gathering the right materials. This step is important for a strong and useful bag. Choosing the right fabric, tools, and extras makes the process smooth and enjoyable. Each part plays a role in how the backpack looks and works. Below are the key materials needed.
Fabric Choices
Select a fabric that is durable and water-resistant. Common options include nylon, canvas, and polyester. Nylon is light and strong. Canvas is thick and sturdy. Polyester resists water and dries quickly. Pick a fabric that fits your style and use. Reinforcement fabric can be added for extra strength in stress areas.
Essential Tools
Tools make the sewing and assembly easier. A sewing machine is best for strong stitches. Scissors help cut fabric cleanly. Measuring tape ensures accurate sizes. Pins hold pieces together while sewing. A seam ripper fixes mistakes without damage. Needles and thread are basic but must be sturdy for heavy fabric.
Additional Supplies
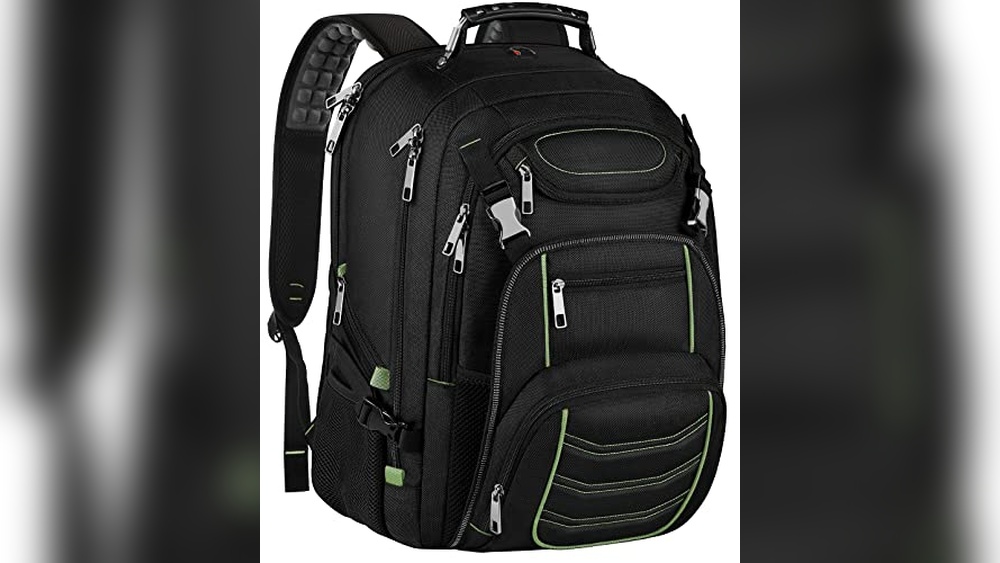
Zippers close the bag securely. Choose heavy-duty zippers for long use. Buckles and straps allow adjustments and comfort. Foam padding adds support and shape. Webbing is used for straps and handles. Thread should match fabric color and be tough. Labels and patches can decorate and personalize the backpack.
Preparing Your Fabric
Preparing your fabric is the first step in making a backpack. This step helps ensure the bag will look good and last long. Taking time to prepare fabric carefully will save effort later.
Choosing the right fabric is important. Durable materials like canvas or nylon work best. After picking fabric, you must measure and cut it precisely. Then, mark seam allowances to guide sewing.
Measuring And Cutting
Start by measuring the backpack parts on your fabric. Use a ruler or measuring tape for accuracy. Double-check all measurements before cutting. Cut slowly and carefully with sharp scissors. Cutting straight lines helps pieces fit together well.
Marking Seam Allowances
Seam allowances add space for sewing edges together. Usually, a ½ inch allowance works well. Mark these lines on fabric with chalk or a fabric pen. Clear marks help keep sewing neat and even. This step stops fabric from fraying or coming apart.
Sewing The Main Body
Sewing the main body is the heart of making a backpack. This step shapes the bag and holds everything together. You start by joining different fabric pieces called panels. Each panel forms part of the bag’s sides, front, back, and bottom.
Choosing the right stitch and technique is key. Strong stitches keep the backpack durable. Careful sewing makes the bag look neat and professional. Focus and patience help avoid mistakes and weak spots.
Stitching Panels Together
First, place the panels edge to edge. Pin them to keep steady. Use a sewing machine for straight, even stitches. Sew slowly to control the fabric. Leave a small seam allowance for strength. Make sure the stitches are tight and close.
Check alignment often. Misaligned panels cause a crooked bag. Press the seams flat with an iron after sewing. It helps the fabric lie smooth and neat.
Reinforcing Seams
Seams must be strong to hold weight. Sew over the seams twice for extra strength. Use a backstitch at the start and end. This stops stitches from coming undone. Add extra fabric strips or tape inside seams for support.
Reinforce high-stress areas like corners and straps. Strong seams prevent tears and damage. Double-check each seam before moving on. A well-reinforced backpack lasts much longer.
Adding Pockets And Compartments
Adding pockets and compartments makes a backpack more useful. Pockets keep small items safe and easy to find. Compartments help organize things inside the bag. This step improves both function and style.
Creating Front Pockets
Start by cutting fabric pieces for the front pocket. Choose a size that fits your needs. Sew the edges to prevent fraying. Attach the pocket to the front panel of the backpack. Use a strong stitch for durability. Add a zipper or flap for closure. This keeps items secure and easy to access.
Attaching Side Pockets
Side pockets hold water bottles or small gear. Cut fabric in a shape that fits the side of the bag. Sew the edges neatly. Pin the pocket to the backpack’s side. Stitch it firmly to handle weight. Consider adding elastic or a drawstring at the top. This helps keep items from falling out.
Constructing Straps
Constructing straps is a key step in making a backpack. Straps hold the bag on your shoulders. They must be strong and comfortable. Good straps help carry weight without pain. This section explains how to cut, pad, and add features to straps.
Cutting And Padding
Start by cutting durable fabric for the straps. Use materials like nylon or polyester for strength. Cut two long pieces, equal in size. Add soft padding inside the straps. Foam or thick batting works well. Sew the fabric around the padding tightly. This gives the straps a soft, cushioned feel. Padding stops straps from digging into the skin.
Adjustable Features
Make straps adjustable for a perfect fit. Attach plastic or metal buckles at the ends. These allow changing the strap length easily. Sew the buckles securely to avoid slipping. Adjustable straps fit different body sizes. They also help balance the weight in the backpack. This feature increases comfort during use.
Attaching Zippers And Closures
Attaching zippers and closures is a key step in making a backpack. These parts keep the bag secure and easy to open. Proper attachment helps the backpack last longer and look neat.
Choosing the right zipper and closure type fits the bag’s style and use. Strong stitches ensure these parts stay in place. Careful work here improves both function and appearance.
Installing Zippers
First, select a zipper that matches the bag size. Place the zipper on the fabric edge. Pin it carefully to hold it steady.
Use a sewing machine or sew by hand with tight stitches. Sew close to the zipper teeth but avoid sewing over them. Check the zipper opens and closes smoothly.
Secure the zipper ends with extra stitches. This prevents the zipper from coming loose. Trim any excess fabric for a clean look.
Adding Buckles Or Velcro
Buckles and Velcro add extra security and adjustability. Choose durable materials that match your backpack design. Mark the spots where you want to attach them.
Sew buckles firmly with strong thread and multiple stitches. For Velcro, sew both hook and loop sides securely. Make sure Velcro aligns perfectly for a tight close.
Test the buckles and Velcro by opening and closing several times. Ensure they hold well and feel strong. Adjust or reinforce if needed before finishing.
Final Assembly And Finishing Touches
The final assembly and finishing touches bring the backpack to life. This stage combines all parts to form a complete product. Careful work ensures strength and neatness. Every detail matters to make the backpack sturdy and attractive.
Connecting Straps To Body
Straps give the backpack comfort and support. Attach each strap firmly to the body using strong stitching. Reinforce the connection points to prevent tears. Adjust strap length to fit different users easily. Secure buckles and loops for easy use. Test the straps by pulling gently to check durability.
Edge Finishing And Inspection
Edges need smooth finishing to avoid fraying. Use binding tape or overlock stitches for clean edges. Trim any loose threads carefully. Check every seam for strength and neatness. Inspect zippers and pockets to ensure they work well. A thorough inspection guarantees a quality backpack ready for use.
Frequently Asked Questions
What Materials Are Needed To Make A Backpack?
To make a backpack, you need durable fabric like nylon or canvas, strong thread, zippers, buckles, and padding. Quality materials ensure the backpack is sturdy, functional, and comfortable for daily use or travel.
How Do You Design A Functional Backpack?
Design a functional backpack by planning compartments, choosing ergonomic straps, and adding padding. Consider user needs like size, weight distribution, and accessibility to enhance comfort and usability.
What Sewing Techniques Are Best For Backpacks?
Use reinforced stitching, double seams, and bar tacks for strength. These techniques increase durability and prevent wear and tear, making the backpack last longer under heavy use.
How Long Does It Take To Make A Backpack?
Making a backpack typically takes 4 to 8 hours depending on design complexity and skill level. Beginners may need more time, while experienced makers can complete it faster.
Conclusion
Making a backpack takes patience and simple steps. Choose the right fabric and strong zippers first. Cut pieces carefully and sew them together with care. Add straps and pockets to fit your needs. Testing your backpack ensures it works well and lasts long.
This project teaches useful skills and creativity. Anyone can make a backpack with time and effort. Try it yourself and enjoy a bag made by your own hands.