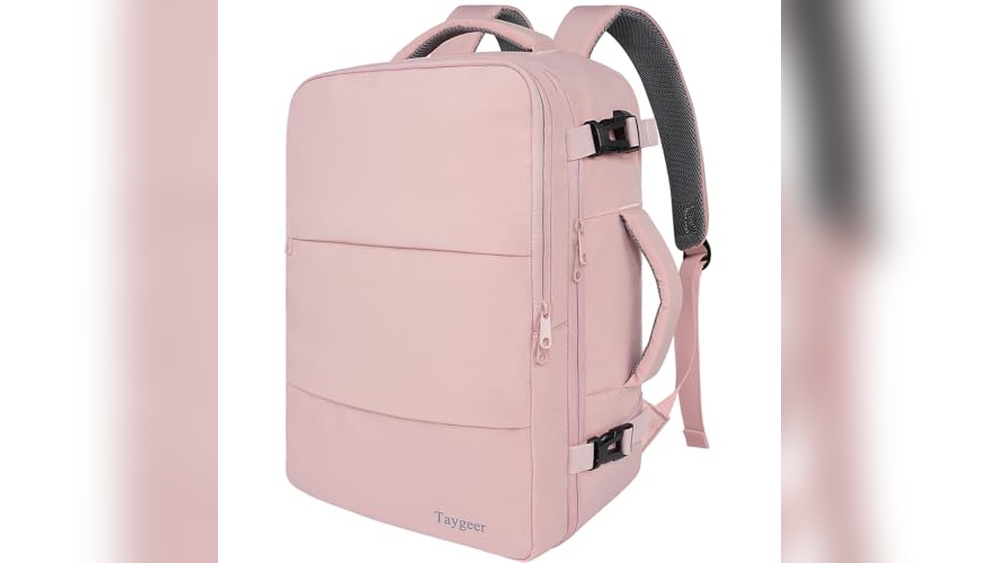
Imagine having your favorite backpack double as a cooler whenever you need it. Whether you’re heading out for a picnic, a day at the beach, or a long hike, keeping your drinks and snacks cold without carrying extra bulky gear can make a huge difference.
What if you could turn your regular backpack into a cool, refreshing storage spot in just a few simple steps? In this guide, you’ll discover easy tricks and smart tips to transform your backpack into a cooler that works. Ready to keep your food fresh and chill wherever you go?
Let’s dive in and make it happen!
Choose The Right Backpack
Choosing the right backpack is key to turning it into a cooler. The right pack keeps your drinks cold and your food fresh. Not all backpacks work well for this purpose. Some materials and sizes suit cooling better than others. Think about what you will carry and how long you need to keep it cool.
Material Matters
The backpack’s material affects insulation and durability. Look for thick, water-resistant fabric. Nylon and polyester often work well. They stop water from leaking and keep cold air inside. Avoid thin or mesh materials. They do not hold cold temperatures. A backpack with a foil or insulated lining is best. It helps keep ice from melting quickly.
Size And Compartments
Pick a backpack size that fits your needs. A medium size holds enough drinks and snacks. Too large means heavy and bulky to carry. Too small limits what you can store. Compartments help organize your cooler items. Separate pockets keep food and drinks apart. Look for a backpack with a main insulated section. Extra pockets are good for utensils or napkins. This makes packing and unpacking easier.
Gather Cooling Materials
Gathering the right cooling materials is the first step to turn your backpack into a cooler. You need to create a setup that keeps your food and drinks cold for hours. This involves choosing good insulation and effective cooling packs or alternatives.
Insulation Options
Insulation helps keep the cold inside your backpack. Use materials like foam sheets or bubble wrap. These trap cold air and stop heat from entering. Reflective blankets or aluminum foil also work well. Line the inside of your backpack with these materials. This simple step keeps your items cooler for longer.
Cooling Packs And Ice Alternatives
Cooling packs keep your food cold without making a mess. You can use reusable gel packs or frozen water bottles. Frozen fruits like grapes or berries work too. Dry ice is an option but handle it carefully. Avoid regular ice cubes to prevent water from soaking your items. Choose options that stay cold and won’t leak inside your backpack.
Prepare The Backpack
Preparing the backpack is the first step to turn it into a cooler. This step helps keep your drinks and food cold for hours. It makes the backpack ready to hold ice and keep the cold inside.
Clean And Dry
Start by emptying the backpack completely. Wipe the inside with a damp cloth to remove dirt. Let it dry fully to avoid mold and bad smells. A clean and dry backpack keeps your items fresh.
Add Insulation Layers
Next, add materials to keep the cold in. Use foam sheets or bubble wrap for good insulation. Line the inside walls and bottom of the backpack. This layer slows down heat from outside. It makes your backpack work like a cooler box.
Seal And Secure The Cooler
Sealing and securing your backpack cooler is vital for keeping ice and drinks cold. A tight seal stops warm air and water from getting inside. It also prevents leaks and spills during travel. Focus on making the backpack as waterproof and secure as possible. This keeps your food fresh and your gear dry.
Waterproofing Tips
Use waterproof spray on the backpack’s inside and outside surfaces. This helps stop water from soaking through the fabric. Apply two coats for better protection. Let each coat dry fully before adding the next. You can also line the inside with a plastic sheet or heavy-duty trash bag. This adds an extra layer against leaks. Seal edges with waterproof tape to prevent water from slipping in. Avoid using thin materials that can tear easily.
Zipper And Closure Enhancements
Zippers are common weak points for leaks. Cover the zipper area with waterproof tape or a zipper sealant. You can buy zipper covers designed to keep water out. Another option is to add Velcro strips over the zipper for extra security. Use strong clips or buckles to lock the backpack shut tightly. Check for gaps where air or water can enter. Tighten all closures before use. These small steps improve insulation and stop spills.
Pack And Use Your Cooler Backpack
Using a backpack as a cooler is smart and practical. It keeps your drinks and snacks cold without extra bags. You can carry it easily on hikes, picnics, or beach trips. Packing it right makes a big difference in how well it stays cool. Knowing how to care for it keeps it fresh and lasts longer.
Loading Tips
Start with ice packs or frozen water bottles at the bottom. They keep the backpack cold for hours. Next, add your drinks and food on top of the ice. Use small containers to keep food fresh and prevent leaks. Pack tightly to stop air from moving inside. Close the backpack zipper fully to trap the cold air. Avoid opening the backpack often to keep it cool longer.
Maintenance And Cleaning
Empty the backpack after each use. Remove all food and ice packs. Wipe the inside with a damp cloth to clean spills. Use mild soap and water for tough stains. Let the backpack air dry with the zipper open. Avoid strong chemicals that can damage the cooler lining. Store the backpack in a dry place to prevent mold. Clean regularly to keep it smelling fresh and working well.
Creative Modifications
Creative modifications make your backpack cooler more useful and fun. These changes help organize items and improve comfort during use. Small tweaks transform a simple backpack into a handy cooler for outdoor trips.
Think about extra features that fit your needs. Simple additions can hold drinks, snacks, or utensils. Comfort upgrades keep your shoulders and back happy, even on long walks.
Adding Pockets For Accessories
Sewing or attaching pockets gives space for small items. Use mesh or insulated pockets for easy reach and extra cold storage. Pockets keep your phone, keys, and napkins safe and dry.
Place pockets on the sides or front. This setup separates snacks from ice packs and drinks. Pockets help keep everything organized and prevent spills inside the main compartment.
Customizing For Comfort
Add padded straps or cushions to reduce shoulder pain. Use breathable materials to stop sweat build-up. A softer back panel makes carrying heavy loads easier.
Adjust the straps to fit your body shape well. Balanced weight means less strain on your back. Comfort tweaks let you enjoy outdoor activities longer with the cooler backpack.
Frequently Asked Questions
How Can I Make A Backpack Into A Cooler?
To make a backpack a cooler, line it with insulated materials like foam or reflective foil. Add a waterproof liner to prevent leaks. Use ice packs or frozen water bottles for cooling. This setup keeps your drinks and food cold for hours during outings.
What Materials Do I Need For A Backpack Cooler?
You need foam or reflective insulation, a waterproof liner, and ice packs. Scissors and adhesive tape help secure materials inside the backpack. These items create an effective cooling environment to maintain low temperatures inside the bag.
How Long Will A Backpack Cooler Keep Items Cold?
A well-insulated backpack cooler can keep items cold for 4 to 6 hours. Using sufficient ice packs and keeping the bag closed helps maintain the temperature longer. Avoid opening frequently to preserve the cooling effect.
Can I Use Any Backpack As A Cooler?
Not all backpacks work well as coolers. Choose one with a spacious interior and water-resistant material. Backpacks with sturdy construction allow easy insulation lining and better temperature retention. Avoid backpacks with mesh or thin fabric.
Conclusion
Turning a backpack into a cooler saves money and space. It keeps drinks and food cold for hours. You only need a few simple items to start. This DIY project works well for trips and picnics. Try it yourself and enjoy fresh snacks anywhere.
Staying cool outdoors has never been easier. Give it a go and see the difference. Simple steps, big results.